Docs · Guide
Linking Data
Before we take a look at how we actually link data in Toca, let's first revisit why we might want to link table data.
- Avoid Redundancy: Instead of repeating user information for every order, you just link them. If a user's details change, you update them once, and it reflects everywhere.
- Data Integrity: Relationships help keep your data consistent and accurate, maintaining the links between each row of data.
- Powerful Queries: You can easily find all orders by a specific user or all users who ordered something from a specific category.
- Better Organization: Relationships make your app's data structure clearer and easier to understand as it allows you to model the data more closely to the real world representation of the data.
Connecting Your Data: Relationships in Toca
Imagine you're building an eCommerce app where users can buy items and get their orders delivered to them. You'd have products, you'd have users, their orders and their addresses. Each user has an address, and each user might have ordered multiple products. How do you represent this connection in Toca? That's where relationships come in!
What are Relationships?
The table relationships you find in Toca are heavily inspired by, but not exactly the same as, relationships you find in databases. A relationship is a link between a row of data in one table to another row of data in a different table. The link is represented by the ID of the row you are linking to. This will be easier to visualise with an example so let's build on our eCommerce use case!
Here we have our Users table that we have already created:
| Id | Name | Email address | Profile picture | Date of birth |
|---|---|---|---|---|
| 1 | Alan Turing | alan@computers.inc | 💻 | 1912-06-12 |
| 2 | Tim Berners-Lee | tim@worldwideweb.com | 🌐 | 1955-06-08 |
| 3 | Linus Torvalds | linus@linux.net | 🐧 | 1969-12-28 |
Now, if we have a table of addresses below:
| Id | Address Line 1 | Address Line 2 | City | Area Code |
|---|---|---|---|---|
| 50 | Bletchley Park | Milton Keynes | Buckinghamshire | MK3 6EB |
| 42 | CERN 1211 | Esplanade des Particules 1 | Geneva | 1217 |
| 64 | University of Helsinki | Yliopistonkatu 4 | Helsinki | 00100 |
How do we link the two tables together so that each user is associated with an address?
The first thing to do is think about the real world relationships in the data we are representing. In this case, it is most common for multiple people to be associated with a single address. So when we take that into account, it makes the most sense to add an "Associated Address" field to our User's table. It's also good to think about how you want to display your data. If you are building an App and you might have a Profile page which contains all the details about your user, the Address is something that you'd want listed on the Profile page so the User is the parent and the Address is the child.
| Id | Name | Email address | Profile picture | Date of birth | Associated Address |
|---|---|---|---|---|---|
| 1 | Alan Turing | alan@computers.inc | 💻 | 1912-06-12 | 50 |
| 2 | Tim Berners-Lee | tim@worldwideweb.com | 🌐 | 1955-06-08 | 42 |
| 3 | Linus Torvalds | linus@linux.net | 🐧 | 1969-12-28 | 64 |
Now if we want to see what address is linked to a user, we just need to follow the ID in the Associated Address column and search for it in the ID column of the Addresses table.
Creating Relationships
Toca supports two different types of relationship, a 1 to 1 relationship and a 1 to Many relationship. The example above details a 1 to 1 relationship, so let's take a look at how we can define that in Toca.
First, we need to start with defining our Address table, if you're not sure how to do this, have a read of the previous page in the book!
Now that we have created our table structure, we need to populate it with data. We'll do this manually for now.
Let's now create the link between the two tables, Users and Addresses, so that our data is related. To do this, we want to edit the Users table so we have an additional column in it called "Associated addresses". Head to the Columns tab of your Users table and click the Add Column button. Normally, we'd configure the column name first but as you'll see, the column name will be configured for us automatically once we set up the table relationship.
We set up a relationship by using a special column type called a Table Relation, this then lets you pick a table to link to and you can then configure the relationship as either a 1 to 1 or 1 to Many.
Now we have created the definition of the relationship, we can use this to improve the integrity of our data! If we go back to the Data tab of our Users table, you'll note a new column called "Associated addresses". You can then edit each row in your users table to link to an address.
We'll take a look at how we can use our related data in the upcoming pages of this chapter.
Exercise ✨
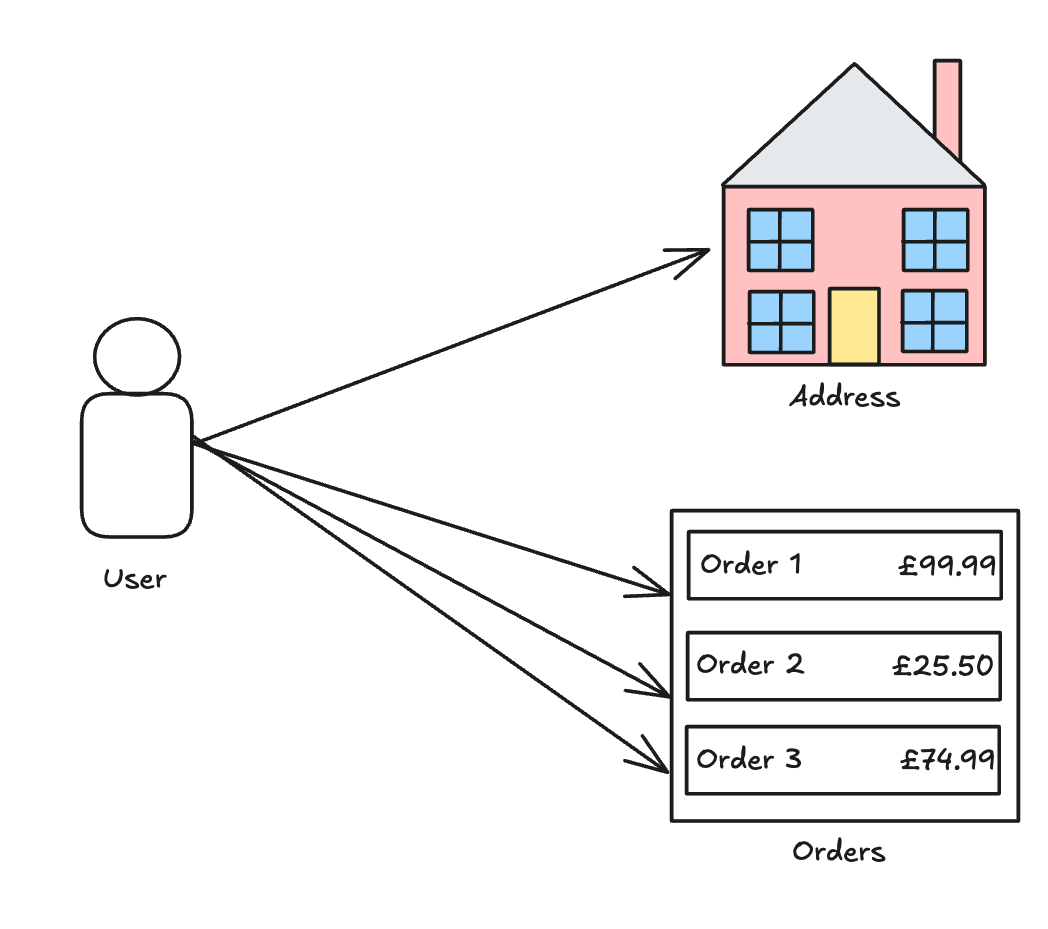
We've just successfully created a 1 to 1 relationship, can you now create a one to many relationship between our Users table and an Orders table? Use the table structure below and the image as a guideline for the structure of the new table and how they relate!
Id Product Category Amount (GBP) 987 Engima Cracking Kit Electronics 99.99 988 Turing Machine Parts Electronics 25.50