
Docs · Guide
Workflows as APIs
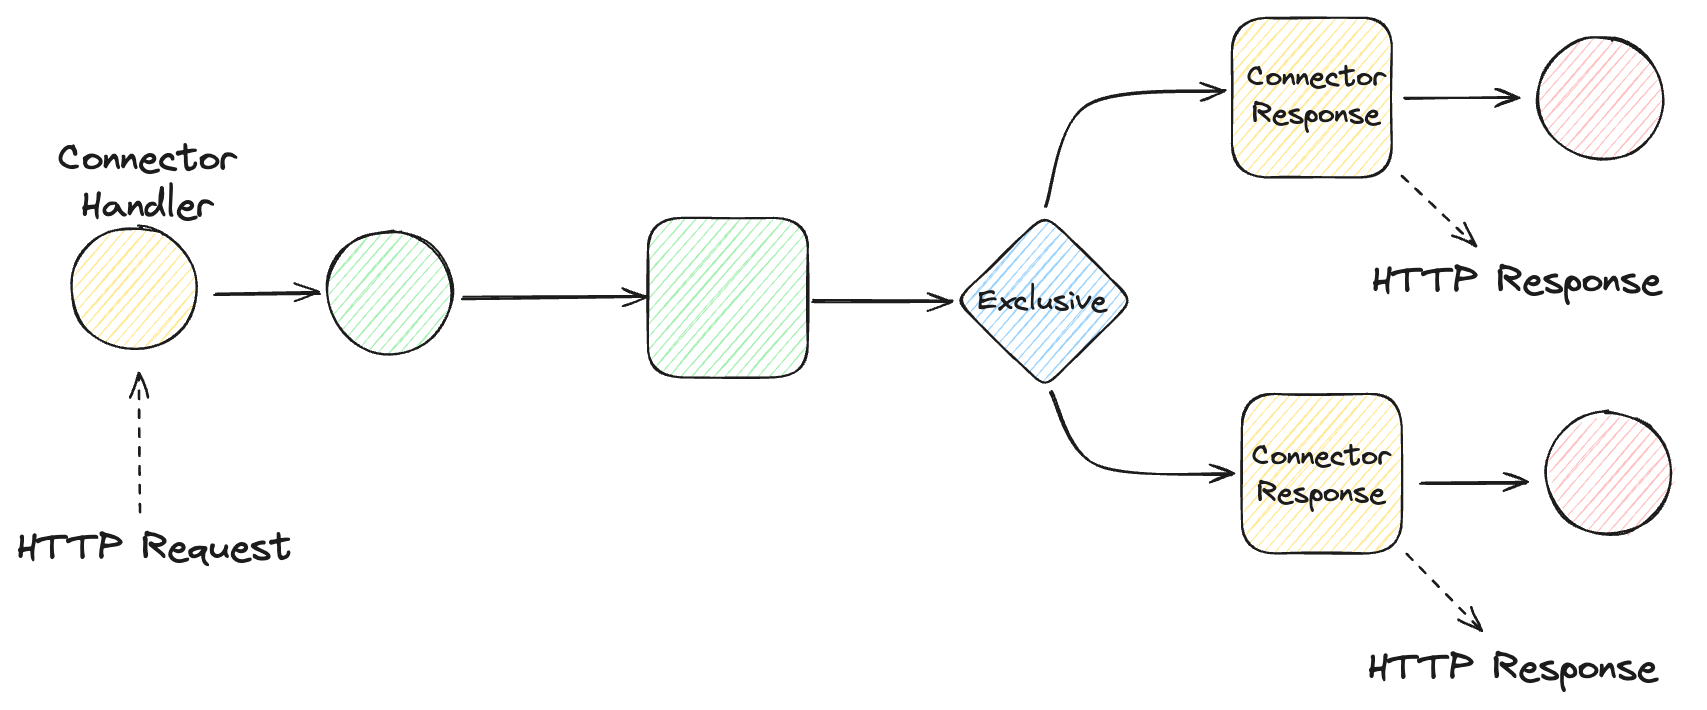 Connectors allow us to trigger a workflow when a specific URL is hit with a certain HTTP method. This allows us to implement anything, from something as simple as a fileserver, to a full HTTP API.
Every instance of a connector has a handler which receives a HTTP request at a given route, and optionally one or more responses which respond to the requester.
Toca connectors
While we can create our own connectors in the TDK, Toca ships with a few default connectors to get us started. These share some standard behaviours.
Handler
Handlers are represented by a circular node.
Output
The default connectors provide many variables which can be used as inputs to activities in workflows. We may often find ourselves using QueryParameters and Headers from the connector's handler to conditionally execute activities.
Response
Responses are represented by square nodes.
Code
Each connector can respond with different status codes. This functionality can be particularly useful when combined with exclusive nodes to control which response code is sent to the requester depending on activity outputs.
Body
Sometimes, we may want to respond with more than just a status code. The body field of the response allows us to return arbitrary text to the requester.
Method
Toca connectors can only be called by their corresponding HTTP method - a GET request cannot call a POST connector.
Putting it all together
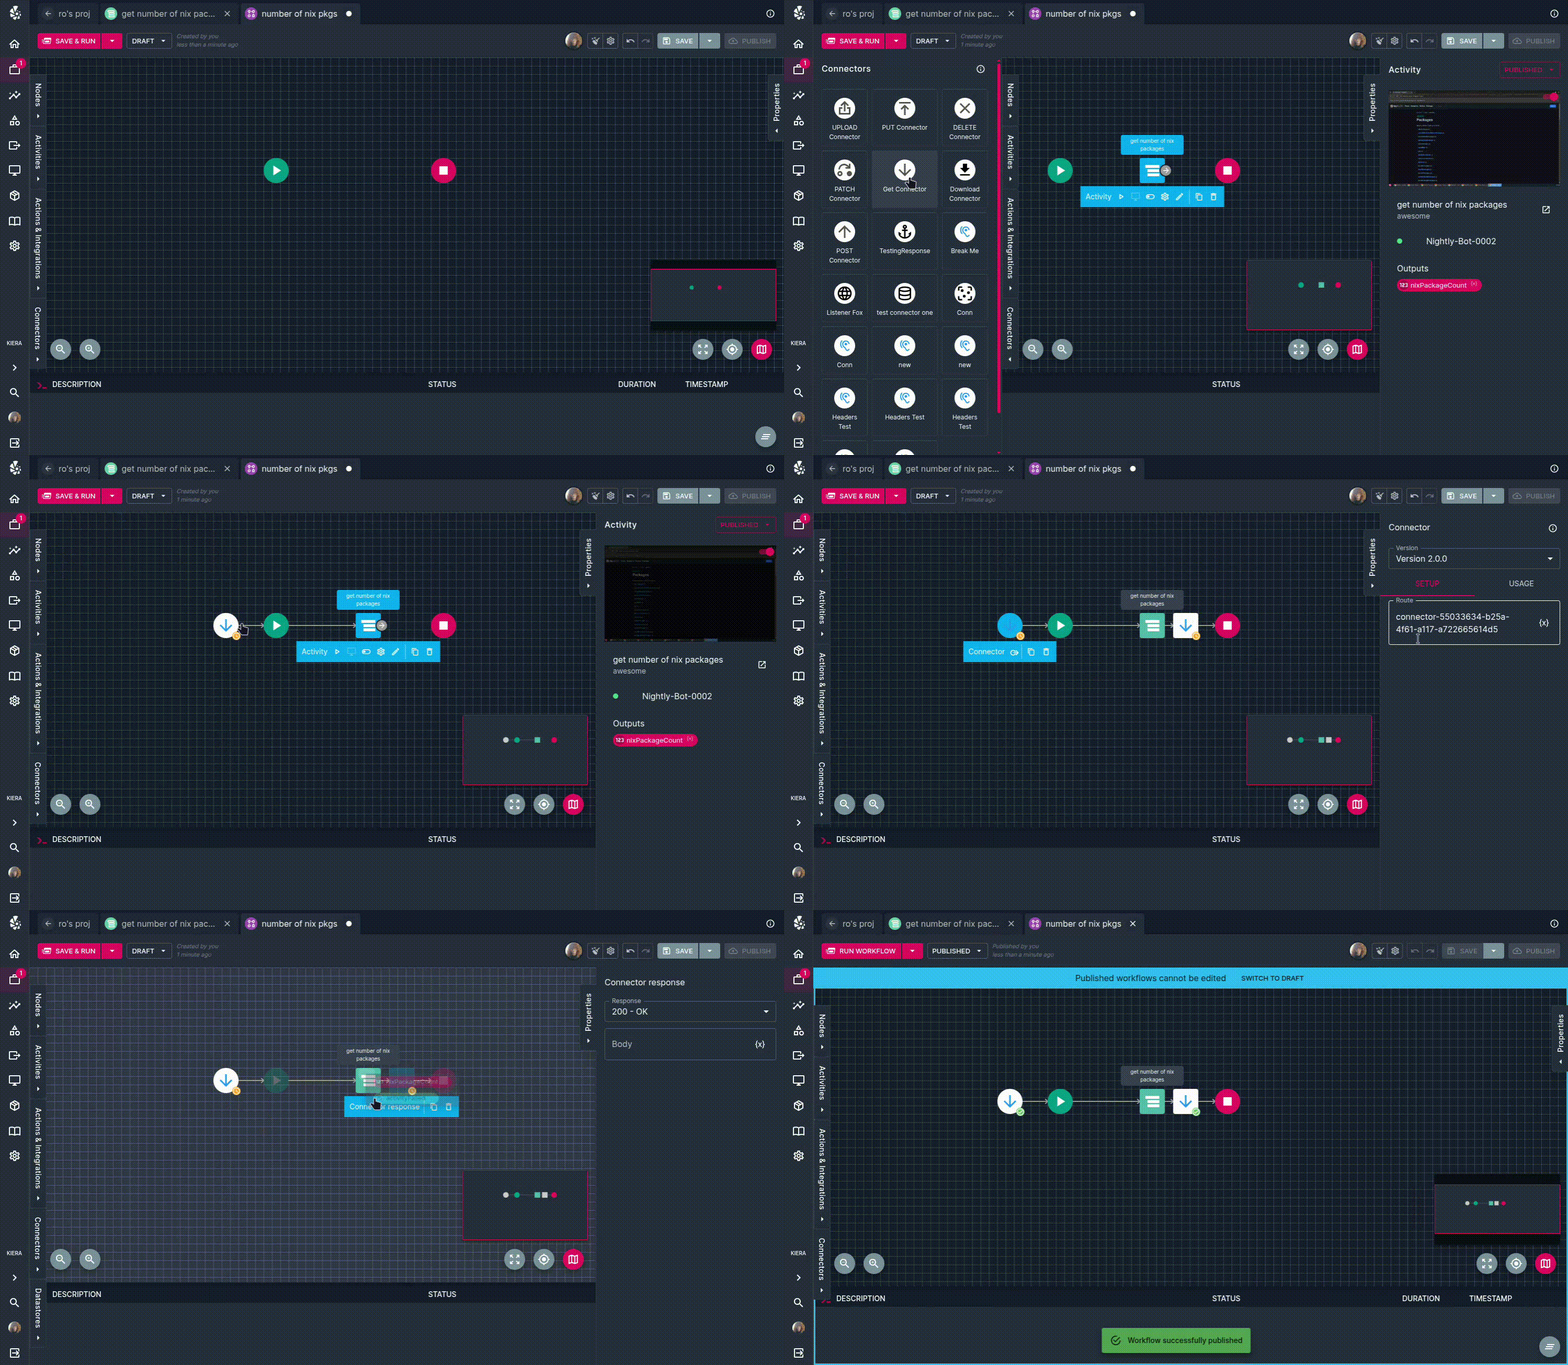
It's very easy to create a basic connector which provides a response to the requester.
- Create a workflow with start and stop nodes.
- Drag a connector from the sidebar - the most commonly used one is the HTTP GET connector. This creates a handler.
- You can customise the API route by clicking on the handler.
- Link the connector node (the handler) to the start node.
- Click on the handler, and click the tooltip button to create a response node.
- You can specify the response body by clicking on the response node.
- Link your final activity to the response node.
- Link your response node to the stop node.