
Docs · Guide
Control Flow
When building out the logic in your application, there are two main building blocks that are incredibly useful. The first is the ability to control which block of logic is executed based on a condition. The second is being able to repeat a block of logic until a condition is met.
Making Decisions
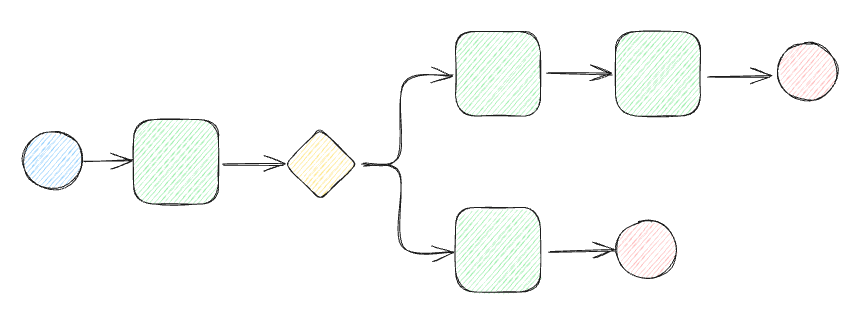
Being able to make your application behave differently based on the outcome of a condition is incredibly useful for both Automation and Apps. Imagine you have some automation which is going through a table of students and your automation needs to sort each student into a school house. Conditional logic makes this really easy as we can create a set of conditions based on the traits of each student.
Below is an example of how this might work:
if "bravery" in student.traits:
    house = "Gryffindor"
if "loyaltly" in student.traits:
    house = "Hufflepuff"
if "intelligence" in student.traits:
    house = "Ravenclaw"
if "cunning" in student.traits:
    house = "Slytherin"
In Apps, this is useful because you might want to hide or obscure parts of your application based on a condition. For example, you might only want to make a button clickable if a user has previously ticked the option to accept the Terms & Conditions of your application.
Conditional Automation
Activities
We've actually already seen how you can implement conditional logic in Automation when we built our Guessing Game. In that example, we used conditional logic to check a user's guess to see whether it was higher, lower or equal to the number they had to guess so that we could return a useful message to the user. Let's quickly revisit that and dive into the If Then action.
The If Then is the most common way to introduce decisions into your automation activities. It allows you to specify a condition and then nest actions underneath it which will only be run if the condition is true.
In the clip above, we can see that we create a number variable equal to 25, and we then add an If Then action to check whether our number is greater than 25. We then placed a Stop Activity action down and importantly we nested this action underneath the If Then. This means that it will only run the Stop Activity action if the condition is evaluated to true.
The first time we run it, it does not run the Stop Activity action and we can see the result of the If Then is false. Once we change the value of our number variable to 26, this means the condition now evaluates to true and the Stop Activity action runs as expected.
Workflows
You can also introduce decisions to your Workflows, this allows your workflow to travel down different paths of execution and run different activities. In a Workflow, you will usually be checking the output of an activity to make that decision. To add conditional logic to your workflow you need to add an Exclusive node and then connect the exclusive up to two or more outcome paths. This will allow you to provide a condition for each path of execution.
You can also have your Workflow travel down a default path of execution if none of the conditions evaluate to true. To do this, you simply need to use the else keyword in your exclusive condition.
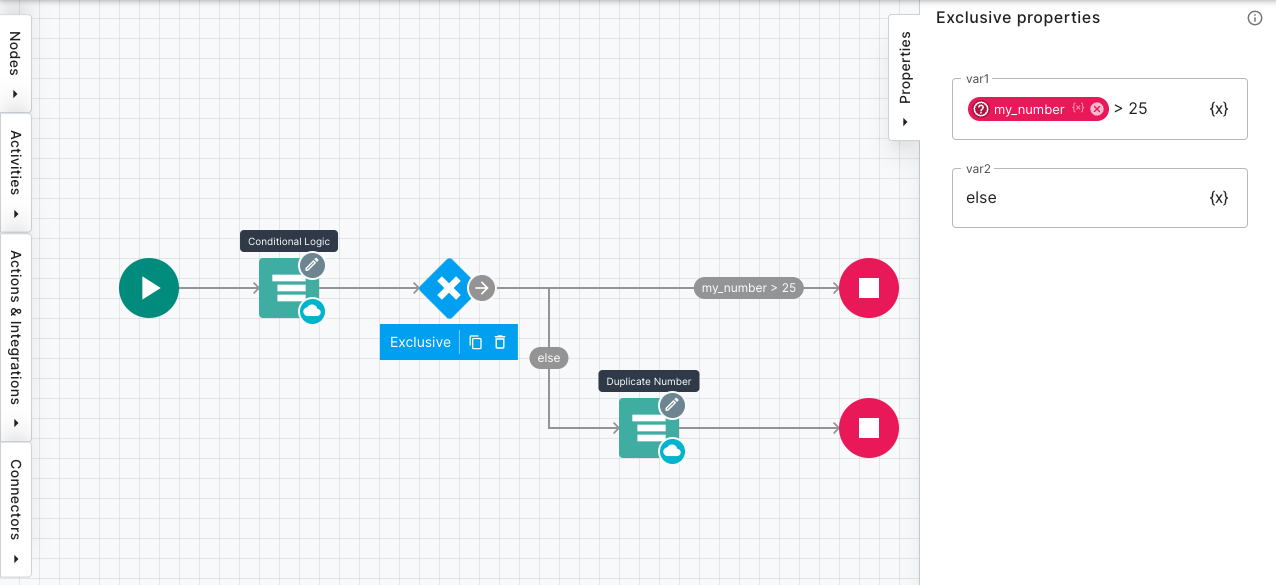
The above example would travel down the else branch if my_numberNumber is 25 or less.
Conditional App Behaviour
You can add conditional behaviour to your Apps as well, this is particularly powerful if you want to conditionally show and hide components on a page. You can implement conditional logic in Apps at both a component level and within In Page Logic (IPL).
App Components
The most common way of conditionally showing / hiding content on your App page is to use the Conditional content component. This component will only display the components that you nest inside it if the condition that you set is true. Let's see this in action with some basic conditions:
In this simple example, we are using the Conditional Content component to control whether we display some text content or not, we are then previewing the App with different conditions to check that it is working.
The Conditional Content component becomes really powerful when you start to use datachips in your condition so you can drive the condition dynamically.
In Page Logic (IPL)
If you have got some IPL on your App page and you need to introduce a decision point to your logic then the IPL mechanism for this is an exclusive node, just like a Workflow in Automation! The exclusive node in IPL works very similarly to the one in a Workflow in that you link it up to 2 or more possible execution paths and you place a condition on each execution path, and whichever ones evaluate to true will be travelled down. Let's take a look at how that might work with a basic example where we'll generate a random number and then update the text on a button depending on if the random number is higher or lower than a threshold value.
As we can see from the above video clip, after clicking on the button a number of times, we get different labels.
Looping
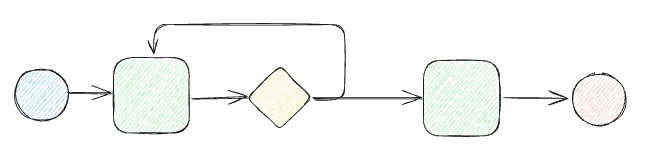
Being able to repeat some logic for a set number of times can be very useful. Imagine you need to multiply every number in a table column by 100 to turn it into a readable percentage, to do that you would need to loop over each row in the table, multiply the existing cell and update it once multiplied. The logic to multiply the number and update the table cell will be the same for every row in the table, so it would be great if we could repeat that logic for every row in a table without having to duplicate our logic. Fortunately, that is exactly what loops allow us to do!
Ultimately, all loops will repeat until a particular condition is met but as you'll find, there are many ways of configuring that condition.
Count Controlled Loops
The easiest type of loop to understand is a count controlled loop, this is a loop that will repeat x number of times. The most obvious example of this is the Repeat action which allows you to specify a repeat number and any actions nested underneath the Repeat action will be repeated that many times. This can be useful in scenarios where you know you need to do something a definitive number of times.
Condition Controlled Loops
Another kind of loop that you will come across is the condition controlled loop, this is a very versatile type of loop as you can come up with the condition yourself. If the condition is true, it would perform another iteration of the loop, if the condition is false, it will not perform another iteration and it will move on to the next task.
With a condition controlled loop, you can say "Repeat this logic until something changes" and that is a very common pattern across the platform. You can use a condition controlled loop in an automation Activity and Workflow as well as in IPL. Let's take a look at how each of those scenarios might work.
First up, a condition controlled loop in an Activity, we'll use the While action to construct this loop.
Collection Controlled Loops
The last type of loop, but arguably the most common, is a collection controller loop and this is a loop that iterates over a collection of data such as a list of values or a table of rows, yielding each value or row as it loops. Once the loop has yielded all values from a collection, it will complete the loop and move on.
The common name for an action that iterates over a collection is a "For Each" action, i.e. for each item in this collection, do something! There are three For Each actions within the automation side of the platform and these are:
- For Each - Iterates over a
Listof values - For Each Row - Iterates over a table, yielding each row
- For Each JSON Object - Iterates over a JSON array, returning each inner JSON value
Early Exit from Loops
There are times when you wish to exit early from a loop, i.e. you might be searching for something in each row of a table and once you have found it you no longer need to search.
This is usually only necessary for collection and count controlled loops as with condition controlled loops you can just change the condition yourself so it stops iterating. For these instances, there is a handy action called Exit Loop which takes the Action ID of the looping action you wish to, this is how the exit loop action knows which looping action you want to exit from.